
Cartography
The cartography is obserae’s model of your infrastructure. You describe networks, hosts, services and groups once, and from then on every rule and every query can refer to them by name:
FROM flows | WHERE src_addr == "backends" AND dst_addr == "postgres"
instead of dragging IPs and CIDRs around.
Common tasks
- Declare the subnets obserae sees in your traffic
- Adopt unknown IPs as hosts
- Create a network, host or group by hand
- Group several hosts in one click
- Mark a DHCP pool so leases stop polluting discovery
- Name your own slices of a network
- Write or import the topology as YAML
The first half of this page is the hands-on guide (the GUI workflow); the second half is the reference — YAML format, validation rules, CLI commands and the name grammar used by rules and NFQL.
The five entities
| Entity | What it is |
|---|---|
| Network | A CIDR block with a name, an optional VLAN id, and an optional DHCP range. |
| Host | A machine, identified by name. Carries interfaces and services. |
| Interface | A (host, name, network, IP) tuple. The IP must belong to the network’s CIDR. |
| Service | A (host, name, protocol, port, [interfaces]) tuple — a port on a host’s interface(s). |
| Group | A named collection of hosts and/or other groups. Groups can nest, and a host can belong to several groups at once (its node sits where the plates overlap). |
One global namespace
Networks, hosts and groups share one namespace. A name used for a network
cannot be reused for a host or a group. This is what lets you write
ip == "production" without disambiguating syntax — the lookup is
unambiguous.
Service names live in a per-host namespace, so every host can declare a
ssh service.
Editing in the GUI
The Cartography page is a live interactive graph. This section walks through building and maintaining the map from the browser; the YAML and CLI sections below do the same from files and the terminal.
Getting around the map
The map is drawn at a constant on-screen size — nodes are the same size and the same distance apart on a laptop and on a large monitor. If your window is small and the whole map does not fit, drag with the right mouse button to pan around it, or scroll to zoom out until everything is in view (nodes and gaps shrink together, so they never overlap). The Fit button recentres the map at its natural size at any time. The map never crams or overlaps its nodes just because the window is narrow.
Names stay readable at every zoom. Node and group labels keep a fixed, legible size whether you are zoomed right in or looking at the whole topology — they never balloon on zoom-out. When many hosts pack into a small area at overview zoom, the map shows a representative subset of their names rather than an unreadable pile; hover a node to read its name in full at any time.
Nothing else moves the view. The map refreshes itself constantly — whenever another admin edits it, and whenever an alert fires — and those refreshes update what the nodes show without ever resizing or shifting what you are looking at. So you can leave the page open on a busy network and keep your place. The one exception is when a refresh would leave you facing an empty canvas (someone imported a whole new topology, say): then the map reframes itself rather than show you nothing. Fit is otherwise the only thing that recentres, and Auto-layout reframes because it has just moved every node.
Fit centres on the bulk of the map, so a single host parked far away from everything else does not drag the view out into empty space. To reach it, pan towards it or zoom out.
One editor at a time (edit lock)
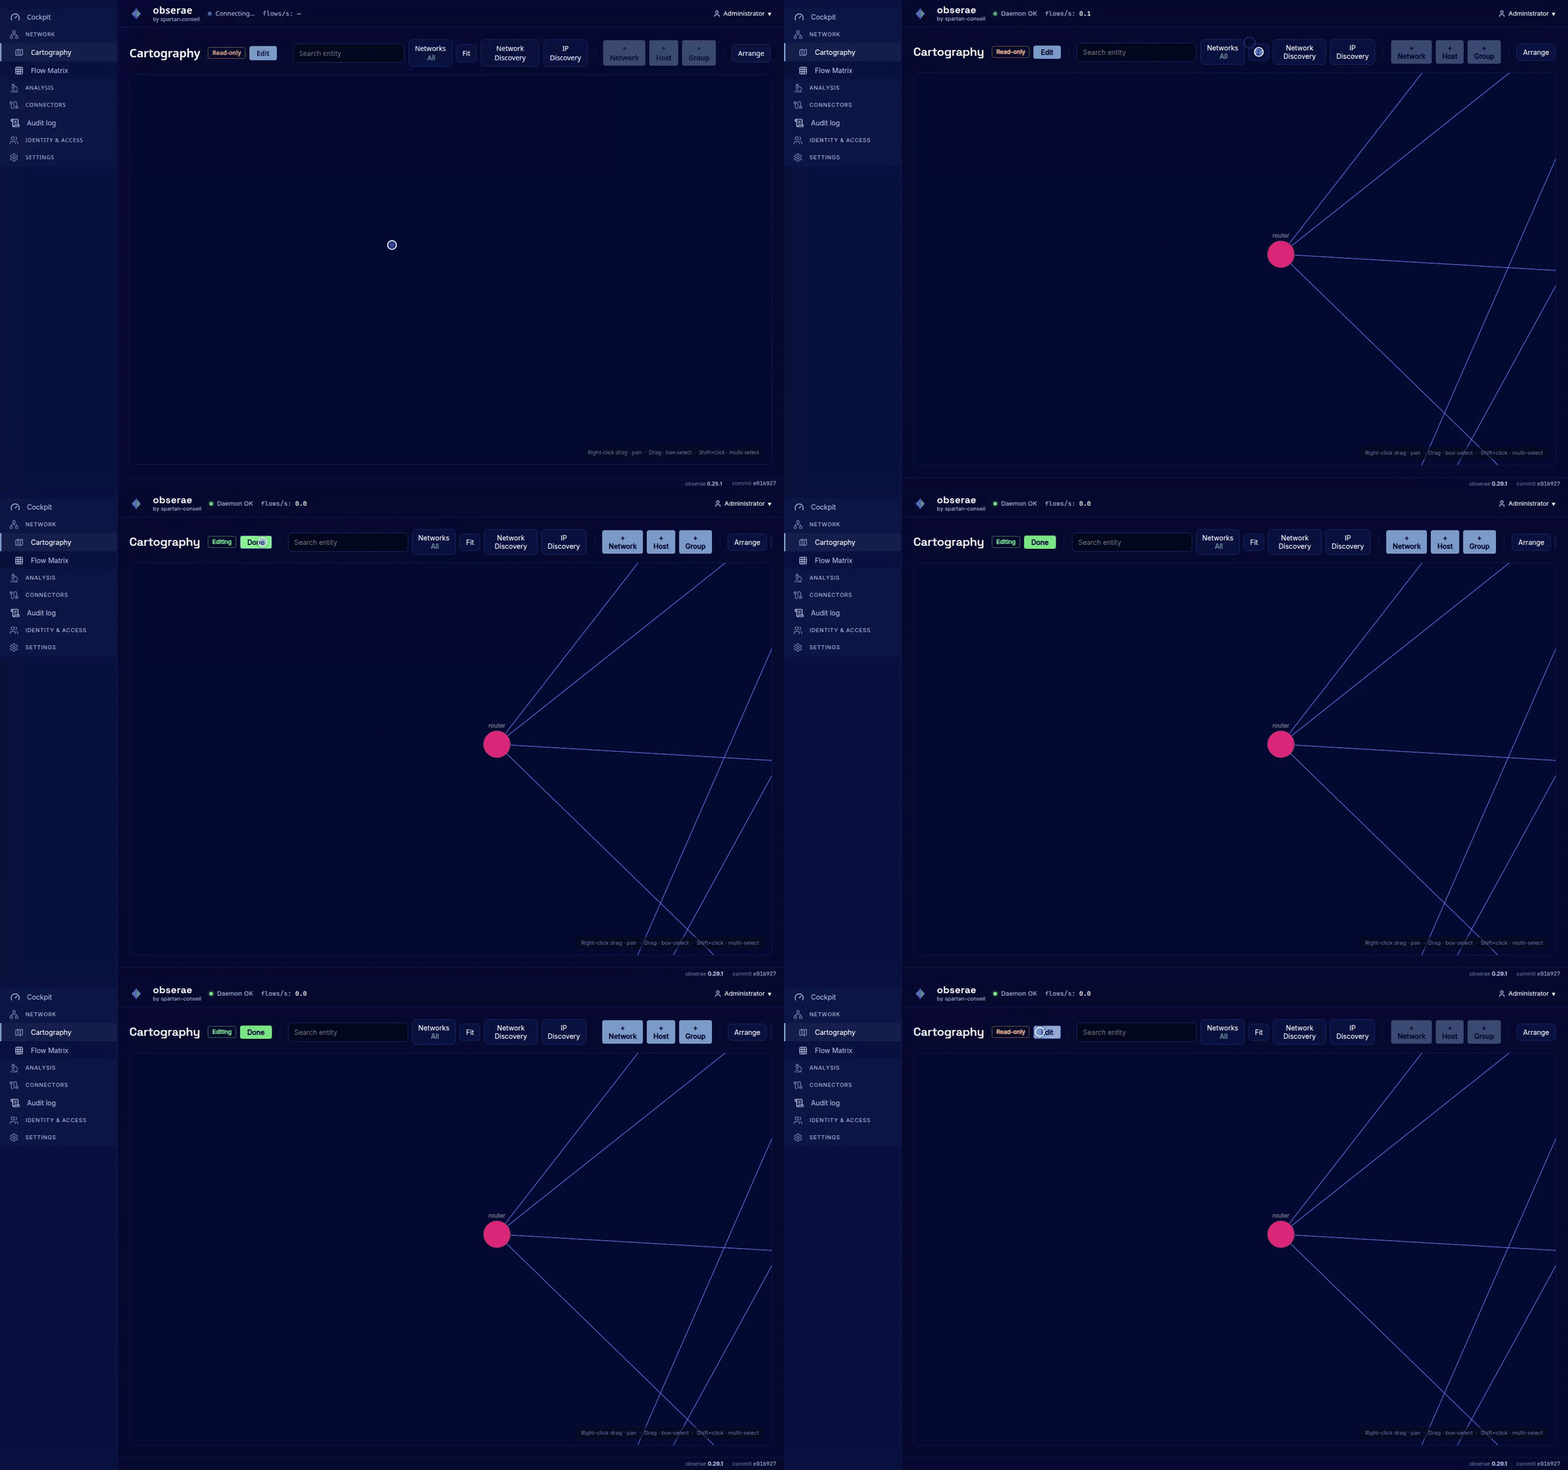
To stop two admins from silently overwriting each other’s changes, the cartography page is read-only by default. To make changes you click Edit: this takes the edit lease and turns the badge green (Editing). Your create / rename / delete / move actions then work normally and each is saved as you go. Click Done to leave edit mode and release the lease — there is nothing to “save”, changes persist immediately.
While you hold the lease, everyone else is read-only: a banner names the current editor (“Cartography is being edited by …”), the mutation controls are disabled, and dragging a node snaps it back. They can still pan, zoom, search and inspect everything, and a Request edit button takes over the moment the lease is free.
Only one editing session can be open at a time — including the same admin in two browser windows. Clicking Edit in a second window is refused until the first clicks Done, so it is impossible to reproduce the double-edit problem by opening two tabs.
The lease is held while the editing tab stays on the page and released immediately when you click Done or leave the page. That page-leave release is authenticated just like every other edit action, so another operator can take over without waiting. As a safety net, it expires on its own after 90 seconds if a tab crashes or loses connectivity (the banner shows a live countdown). The lock is also enforced on the server, so a cartography change from anyone who does not hold the lease is rejected even outside the GUI. It is independent from dashboard edit leases: editing the map does not prevent another operator from editing a dashboard. It is an in-memory lease — restarting the daemon clears it. (It guards interactive editing; a YAML re-import from importing a configuration bundle is a separate, atomic operation.)
Building the map from your traffic: the discovery funnel
Three toolbar buttons turn observed flows into a cartography — first your networks, then your machines, then the translations between them. Typical flow: open Network Discovery, declare the subnets it finds, open IP Discovery — the IPs inside those new networks are now ready to adopt as hosts — and finally NAT Discovery, which points at the addresses that are being translated behind a host you have already declared.
Every drawer carries a small filter box to narrow its rows by IP/hostname (or CIDR/name).
Network Discovery: find your subnets
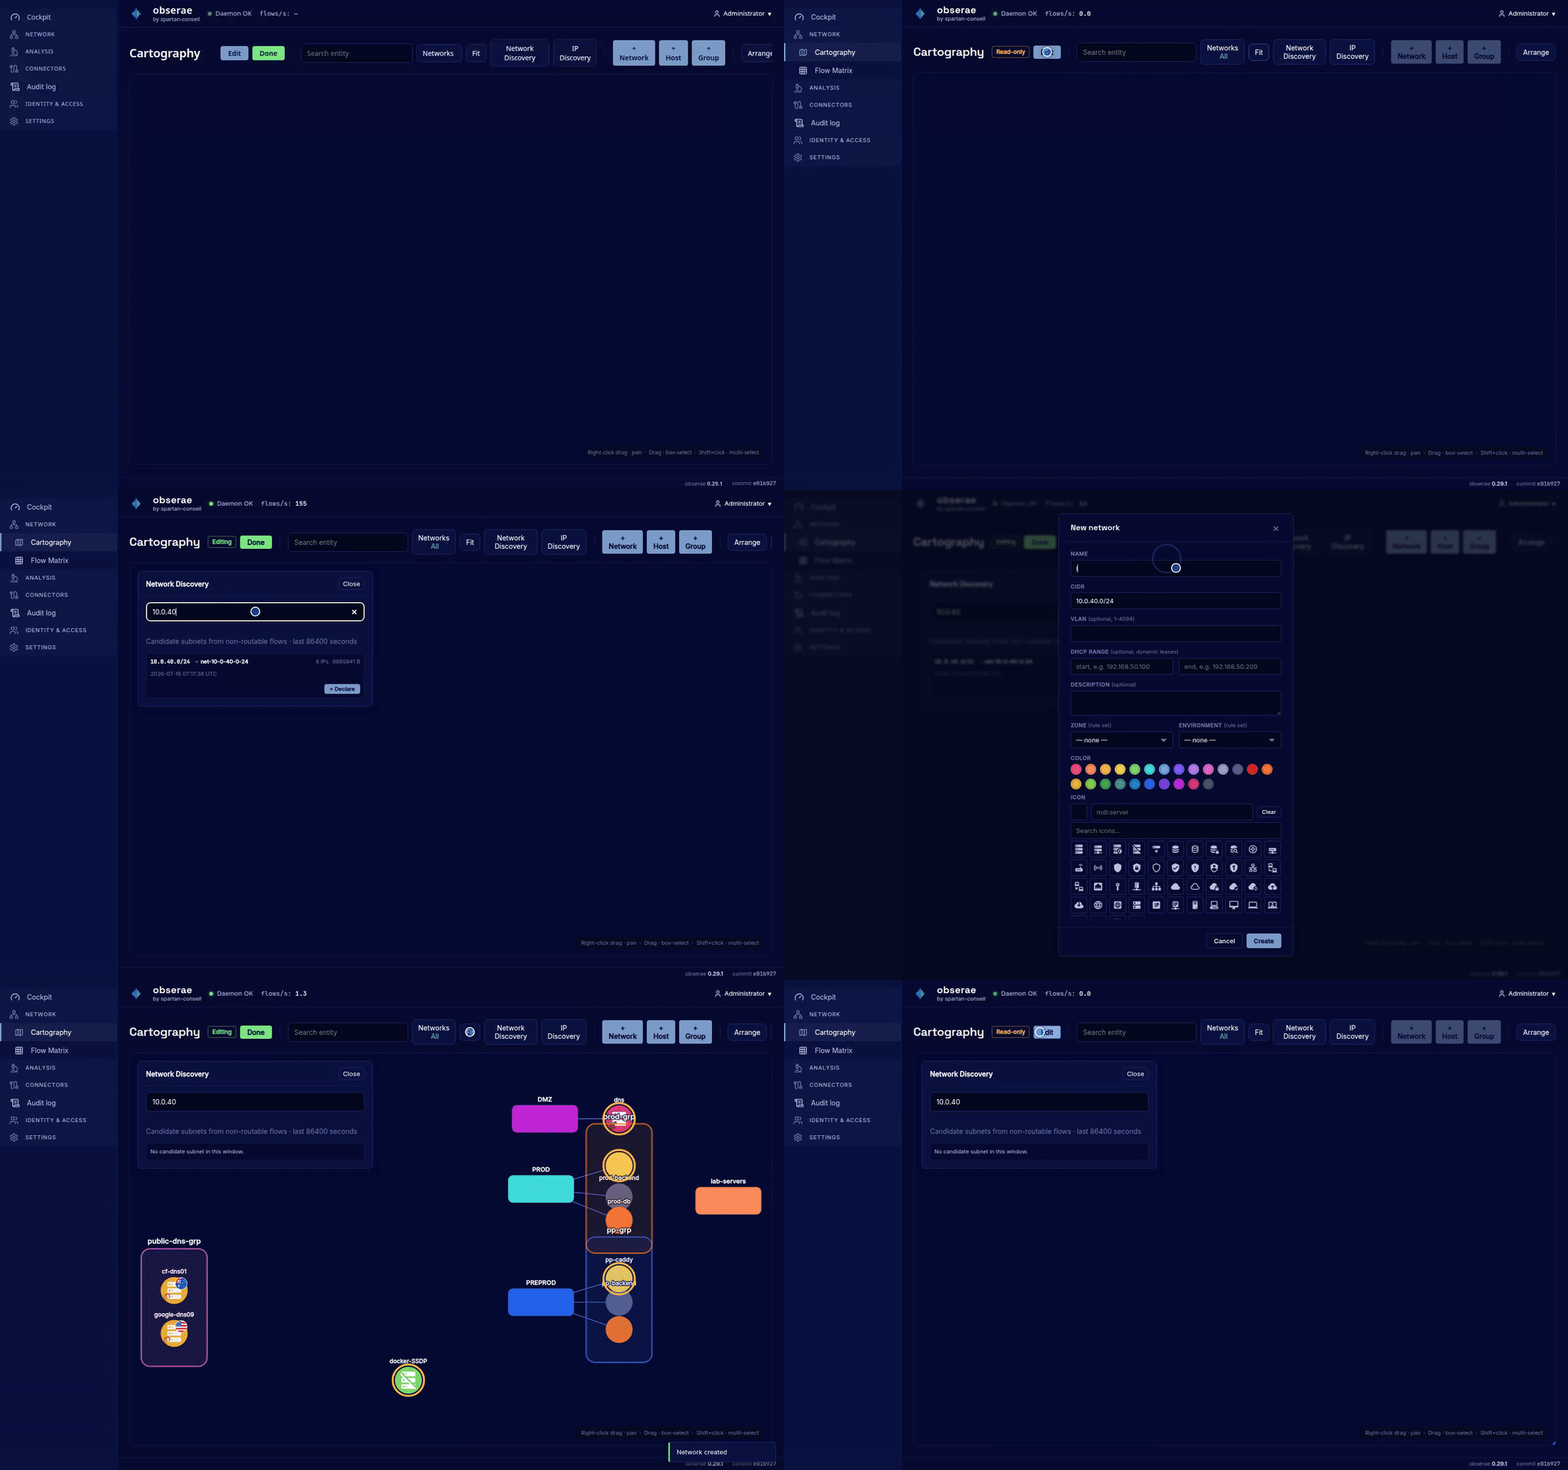
Network Discovery (stage 1) looks at the traffic and proposes the
subnets behind it. It works only on non-routable (private) space —
RFC1918 (10/8, 172.16/12, 192.168/16), CGNAT (100.64/10) and IPv6 ULA
(fc00::/7) — because those are the addresses that describe your segments;
routable peers are external and handled by IP Discovery below.
It clusters the private IPs it sees into candidate networks (a /24 per LAN
by default, widening to /23, /22… when it detects a contiguous,
properly-aligned range), and lists each one with the number of distinct IPs
and the traffic volume behind it. Click + Declare to open the
+ Network form pre-filled with the candidate’s CIDR and a suggested name —
review the name (you can change anything), then submit. The new network
appears on the map and the candidate drops off the list. Subnets you have
already declared are never proposed again.
If you have registered an OPNsense firewall on the Devices page, its interface CIDRs are also proposed here as candidate subnets — ground truth straight from the firewall, not just inferred from traffic.
IP Discovery: adopt your machines
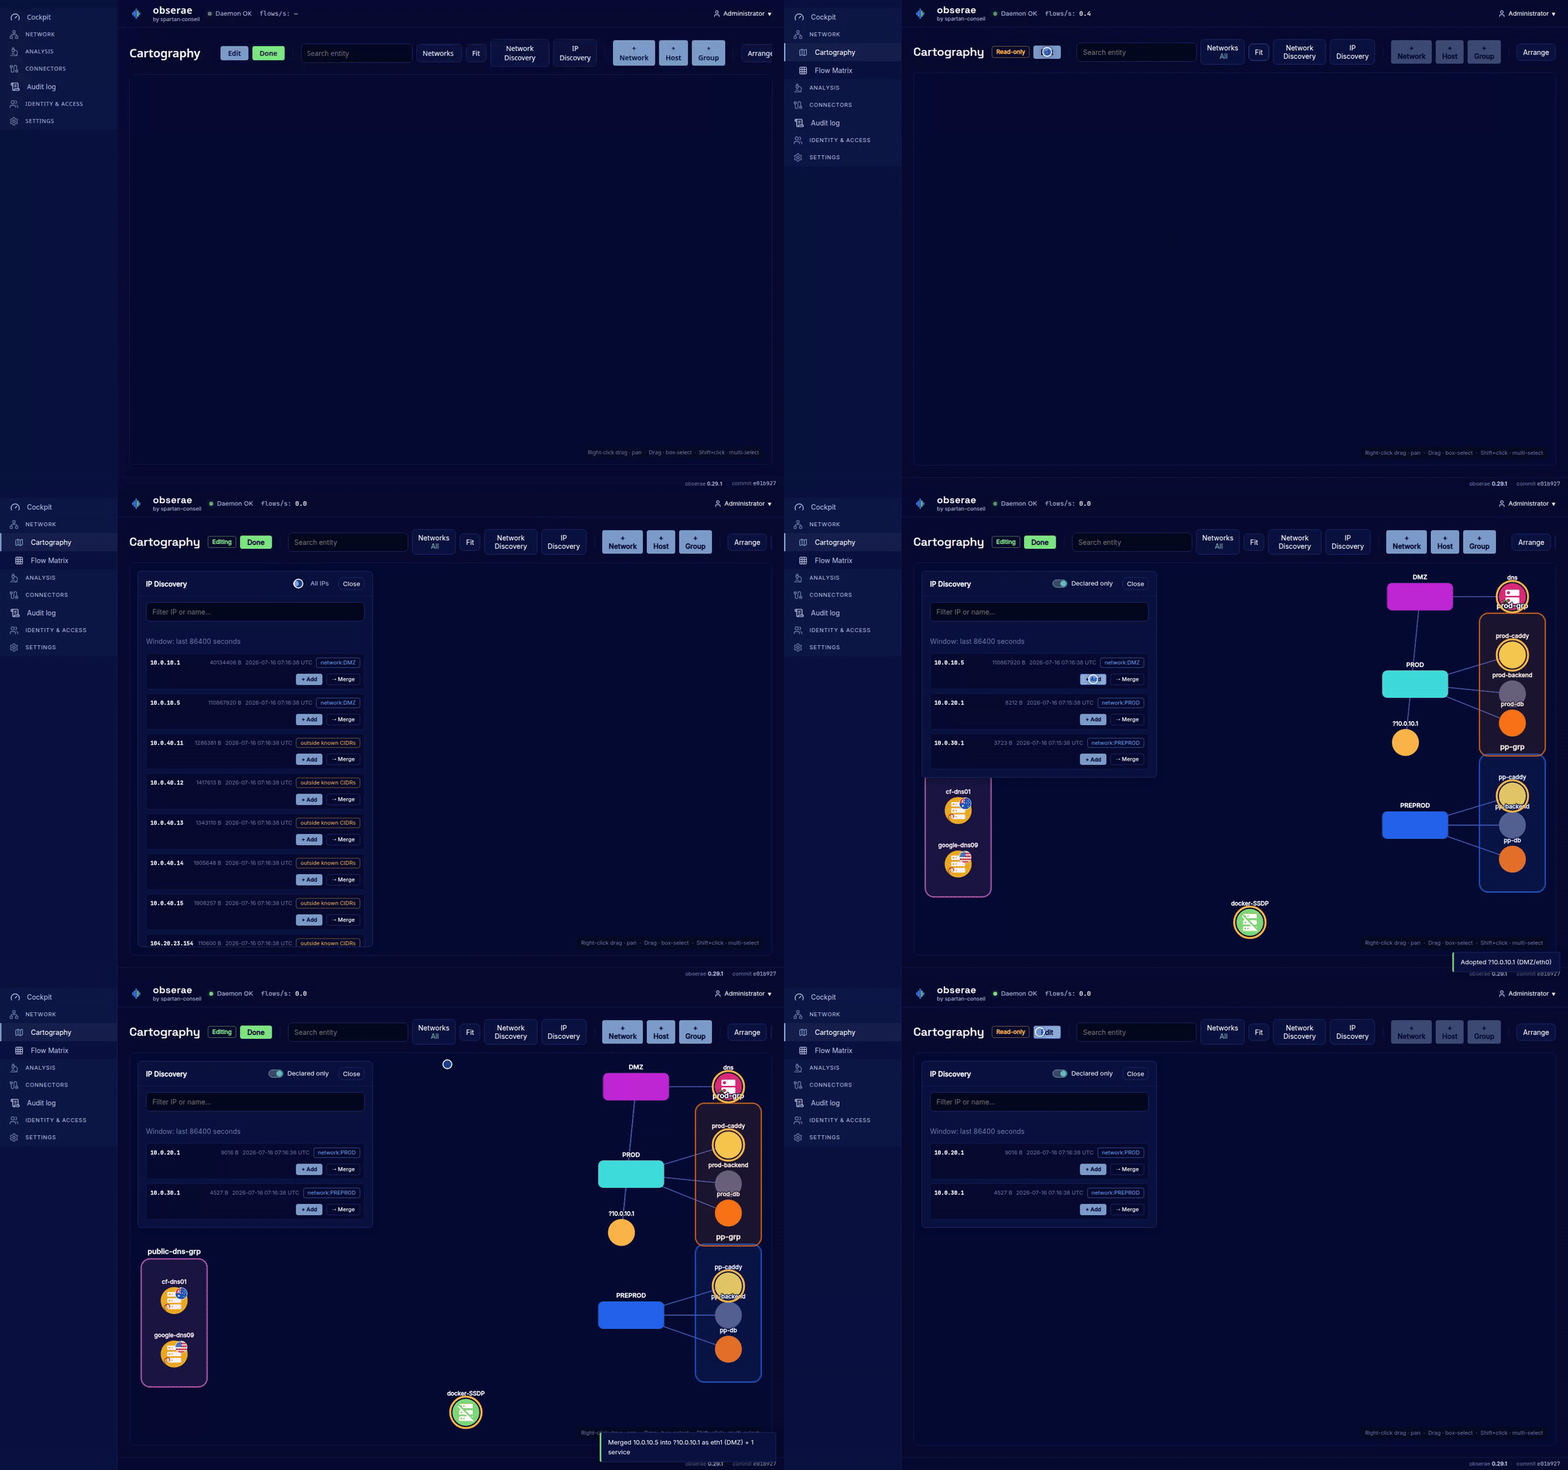
IP Discovery (stage 2, formerly Orphan IPs) lists every individual IP
seen in traffic over the last 24 hours that has no interface yet — the
machines to add as hosts. A switch in the drawer header — All IPs /
Declared only — hides the rows tagged outside known CIDRs so you can
focus on the IPs that already fall inside one of your declared networks (the
easiest to adopt). Each row offers + Add (create a new ?<ip> host with
its inferred services) or ⇢ Merge (attach the IP as a new interface on an
existing host). The filter is session-only: leaving the page resets it to
“All IPs”.
Opening the drawer — or flipping the filter — re-scans the traffic, so a machine that appeared seconds ago is listed. The list then refreshes itself after each adoption from the same scan, which is why those refreshes are instant. + Add creates the host and its interface immediately and detects its services in the background: the toast says detecting services… and the services appear on the host a moment later, without you waiting.
If an OPNsense firewall (Devices) has reported
an IP in its ARP table, that IP is listed first and carries an arp
tag together with the MAC address and hostname the firewall saw — the
authoritative identity for a machine you have not declared yet.
NAT Discovery: declare who translates
NAT Discovery (stage 3) looks for the one situation obserae cannot resolve
on its own: a single probe that captures both sides of a translation — the
classic case being a softflowd that exports a docker bridge and the
physical interface. Both sightings then carry the same exporter address and two
private clients, so neither the address-scope proof nor the exporter-order
proof applies (see
NAT). Until you
declare the topology the container traffic looks like it comes from the host.
The drawer lists, for the last 24 hours, the pairs of clients that talk to the same server socket through the same exporter with comparable volumes, where one client is a declared interface (the candidate gateway) and the other is a private address that is not (the candidate inner address). It reports how many inner addresses and sessions support the proposal and a couple of the servers involved. Translations that are already explained — by a declared interface in the inner network, by an existing SNAT rule, or by a translation the correlator already recorded — are never proposed.
Each row offers the action that fits:
- the inner network is not declared yet → declare it first, with Network Discovery;
- the inner network is declared → Add interface opens the interface form pre-filled with the gateway host and that network (the implicit form: give the host its bridge address), or Set as NAT gateway writes the explicit declaration on the network in one click.
Either way the proposal disappears from the list once the declaration is in place, and later sessions are correlated across the translation.
This drawer is the map-side, contextual entry point. For the whole picture — every translation obserae has already detected, the ones you have rejected, and the automatic-detection toggles — the dedicated NAT page (Web GUI → NAT) shows the same candidates alongside all of it. The drawer links to it with Manage NAT ↗.
Creating entities by hand
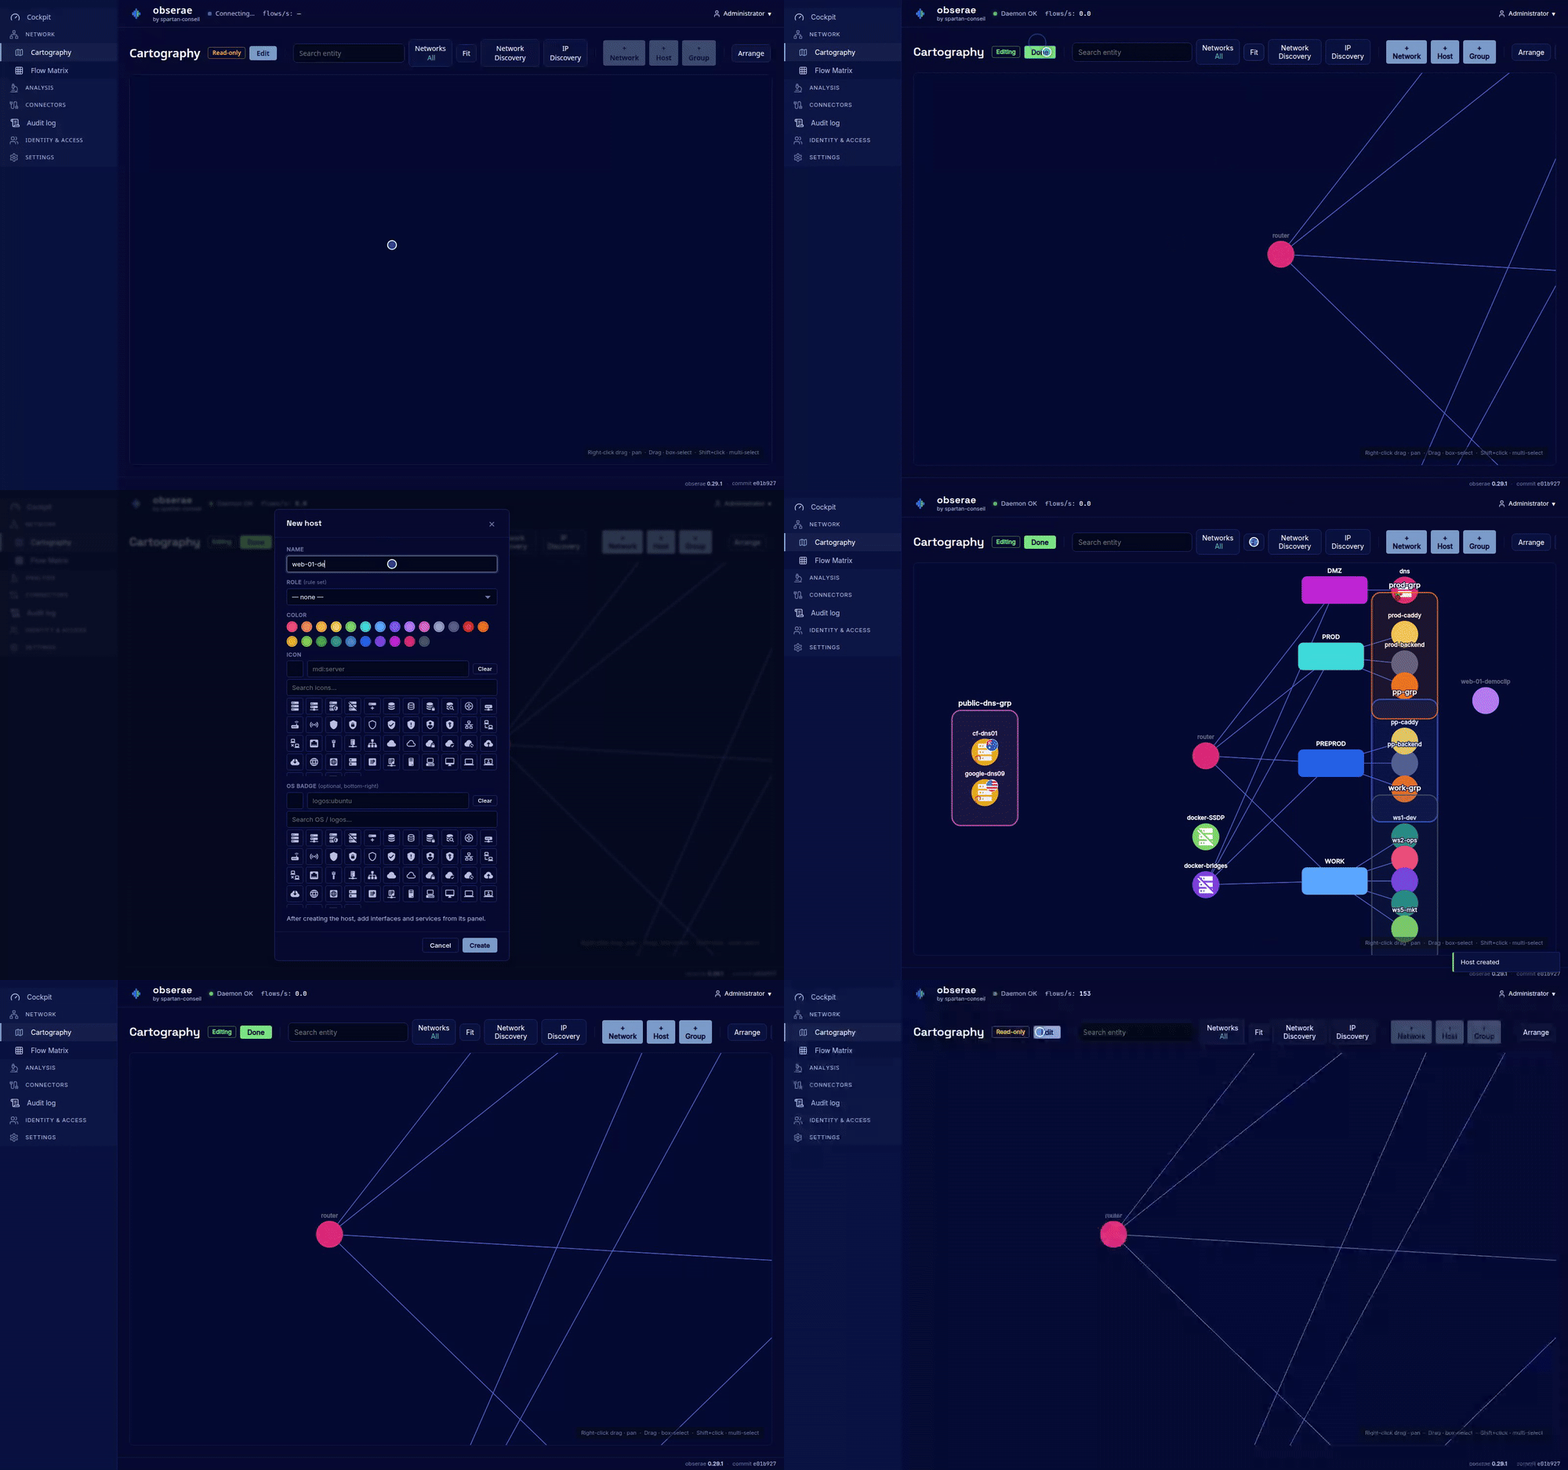
In edit mode, right-click the empty canvas to create a new network, host or group from scratch, or right-click any node for its create / rename / delete actions. Double-click a host, network or group to open its edit form directly — a shortcut for the single-click drawer’s Edit button. (In read-only mode a double-click just inspects the element, exactly like a single click.)
Grouping hosts from a selection
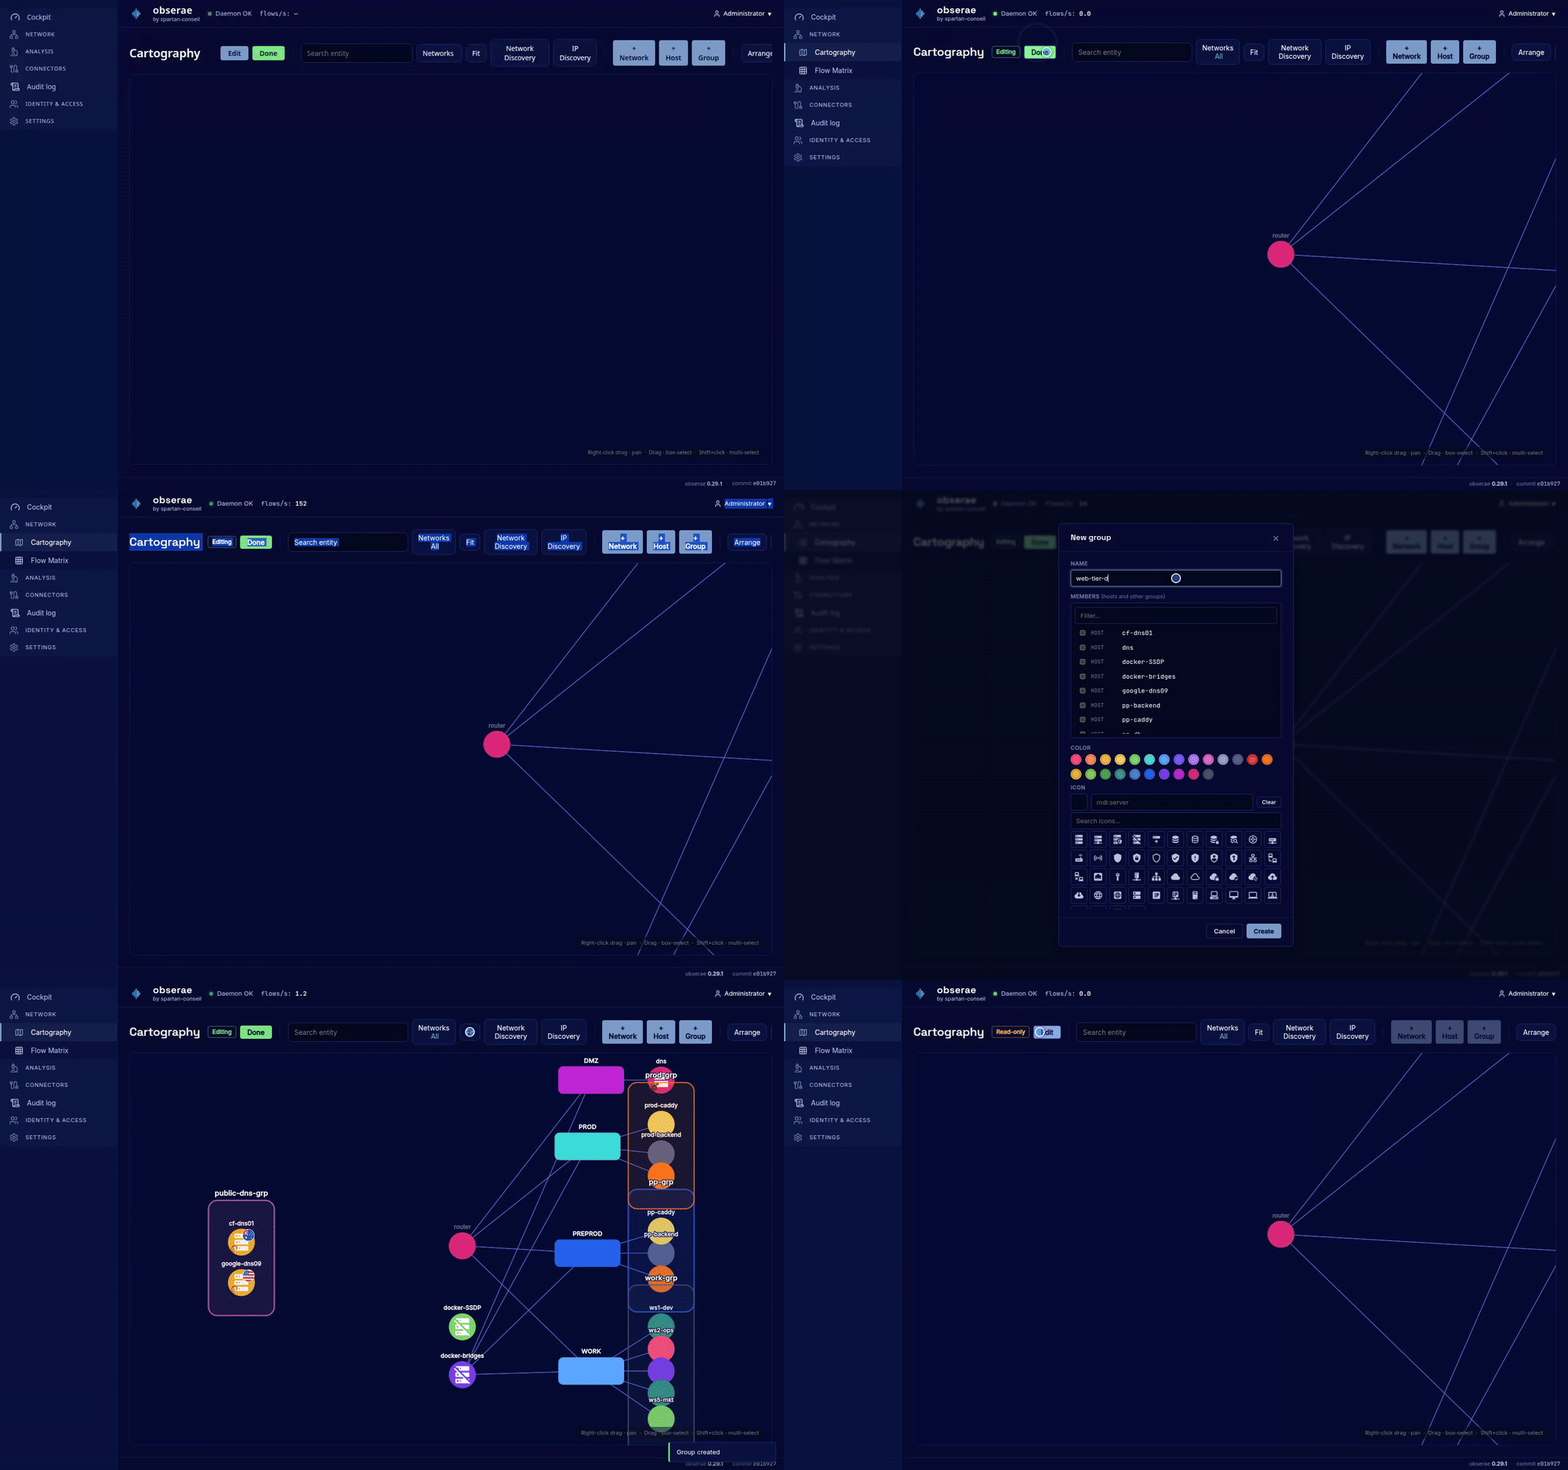
Working with a selection (drag a box, or Shift-click several nodes):
- + Group opens the new-group form with the selected hosts already ticked — no need to re-pick them in the member list.
- Delete removes the selected hosts and networks. A confirmation lists everything that will go, including the cascade (interfaces, services, group memberships), before you commit.
Cloning a host
A host’s drawer has a Clone button — handy for a cluster of machines that share the same interfaces and services and differ only by name and IP. It opens a small form pre-filled with:
- a suggested name: the trailing number is incremented keeping its
padding (
web-01→web-02), or-01,-02… is appended when the name has no number (proxy→proxy-01); - for each interface, the next free IP above the source’s, within the same network.
Adjust the name or any IP if you like, then Clone. The copy carries over every interface, service, interface binding, group membership and the source’s colour/icon, and is selected on the graph once created.
Colours, icons and OS badges
Colour, icon and OS badge are chosen in the entity’s configuration form — open it from the Edit button in the entity’s drawer, or right-click the node and pick Edit (when creating a new host/network/group you can set them straight away). In the form you can:
- Pick a colour — choose a swatch to tint the node. Related hosts get a shared auto-colour by default; a custom swatch overrides it.
- Set an icon — give the node an icon so the map reads at a glance
(a server, a firewall, a database…). In the Icon section, type a
search term to browse matching icons and click one to apply it, or
type an id directly in the form
mdi:server. Icons come from the Iconify collections, so the id isset:name(e.g.mdi:router,logos:docker). Use Clear to remove it. - Set an OS badge (hosts only) — a small second icon shown at the
bottom-left of the host, to mark its operating system
(
logos:ubuntu,logos:microsoft-windows-icon,simple-icons:apple…). It keeps the logo’s own colours. Search by name (try “ubuntu”, “windows”, “linux”) in the OS badge section.
Everything takes effect when you Save the form. These are visual only — they don’t change how rules or NFQL match — and all are undoable with Ctrl+Z. They are saved with the cartography, so exporting and re-importing your YAML keeps every colour, icon and OS badge.
Documenting an entity
Every host, network and group can carry a documentation note written in markdown — a place for ownership, runbooks, or any context that belongs next to the topology (the short description on a network is a one-line summary; documentation is for the longer story).
Click any node and the drawer shows a Documentation section with your markdown nicely rendered — headings, lists, tables, code blocks and links, not raw text. Two buttons sit there:
- Expand opens the documentation full-size in a modal for comfortable reading;
- Edit (in both the drawer and the modal) opens a plain-text editor on the raw markdown. Type, Save, and the rendered note refreshes.
Documentation is part of your topology, so it is included whenever you export the cartography or the consolidated configuration — back it up and move it between instances like everything else.
Alert & enrichment indicators
The map tells you, at a glance, which hosts need attention. A small badge appears at the bottom-right of a host:
- 🔺 Red triangle — the host has one or more active alerts (an alert rule fired on it). This is the strongest signal.
- 🔶 Orange triangle — the host has no alert, but one of its IPs is listed in a threat-intelligence feed. Worth a look.
- 🔵 Blue info dot — the host has no alert and no threat, but one of
its IPs is known to IP enrichment (e.g. a cloud provider range), or
it only has low-importance
infoalerts.
Hover a badged host to see a quick summary of its alerts and enrichment. Click the host to open its drawer, which shows:
- an Active alerts list — each row links to the rule that fired (opens the Detection page filtered to that rule) and a Triggers link that opens Detection filtered to this host;
- an IP enrichment table — the source (AWS, a threat feed…), what it says, and the matching network range.
The badges update live: they refresh whenever the cartography changes and whenever a new alert fires, so you never have to reload the page. They are painted on top of the map rather than being part of it — the topology you edit is drawn first and stays responsive, and the badges, the greying of inactive hosts and the country flags land a moment later. That is why adding, deleting or moving a node answers immediately no matter how much traffic the sensors are handling.
Hosts with only private (internal) IPs won’t get an enrichment badge — IP enrichment only classifies public addresses. Alerts, however, light up any host regardless of its addressing.
DHCP networks
Some segments — office LANs, Wi-Fi, guest networks — hand out addresses
dynamically with DHCP. You can’t model each lease as a host: they rotate
constantly, and they’d flood the IP Discovery list with hundreds of
192.168.10.x you’ll never name.
Instead, tell obserae which slice of the network is the DHCP pool. Set a start and end address on the network:
networks:
  - name: "office"
    cidr: "192.168.10.0/24"
    dhcp_start: "192.168.10.100"
    dhcp_end: "192.168.10.200"
or, in the GUI, open the network’s edit form and fill the DHCP range fields (both or neither). To remove an existing pool, clear both fields and save; its DHCP hexagon disappears from the map. The per-entity CLI does not have a flag for it — use the YAML or the GUI.
Once a network has a DHCP range:
- Dynamic IPs stop being discovered. An address seen in the pool
shows up as
office · 192.168.10.142across the Sessions and Riverview views — attached to the network, not flagged as unknown. - Static reservations keep their name. If you do declare an interface inside the pool (a printer, the gateway), it keeps its host name — the exact match always wins over the pool label.
- The IP Discovery list stays clean. Pool addresses no longer appear
there. (Network and broadcast addresses — the
.0and.255of a/24, for instance — are filtered from IP Discovery too: they’re never real machines.) - The graph shows the pool. On the Cartography page each network
with a DHCP range gets a hexagonal companion node tethered to it
by a dashed edge. The hexagon’s label is
DHCP · N, where N is the count of distinct in-range IPs seen over the last 24 hours — so the pool’s activity is visible at a glance, even dezoomed. Like the other observed indicators it is refreshed in the background, so it can trail reality by a couple of minutes. Clicking the hexagon opens a dedicated DHCP drawer showing the bounds and the live leases. The network’s own drawer still carries the same DHCP row and lease list, so either path works. The hexagon is purely a view of the network: it has no Edit / Delete actions of its own — the range itself is edited via the parent network’s form. When an OPNsense firewall (Devices) is registered, each lease in the drawer also shows the firewall-reported hostname, MAC and manufacturer, tagged by source (NetFlow, OPNsense, or both) so you can see which leases the firewall confirms.
You can also query the two halves of the network by name — office.dhcp
(the pool) and office.static (everything else) — in both NFQL and Flow
Matrix rules:
# who is active on the DHCP pool right now?
FROM sessions | LAST 3600 | WHERE ip == "office.dhcp"

# a dynamic client talking to the IPv4 internet (use internet6 for v6)
FROM sessions | WHERE ip == "office.dhcp" AND ip == "internet4"
See NFQL and Flow Matrix rules for more.
Naming your own sub-ranges
office.dhcp and office.static split a network the way obserae sees it:
dynamic, and everything else. But you probably know more about your own
addressing than that — that .20–.29 is where the printers live, that
.40–.49 is the test bench.
Give those slices a name and you can query them:
networks:
  - name: "office"
    cidr: "192.168.10.0/24"
    dhcp_start: "192.168.10.100"
    dhcp_end: "192.168.10.200"
    ranges:
      - name: "printers"
        start: "192.168.10.20"
        end: "192.168.10.29"
        description: "Printer block"
      - name: "test_device"
        start: "192.168.10.40"
        end: "192.168.10.49"
or, in the GUI, open the network’s edit form and use Named sub-ranges — one row per slice, with + Add sub-range for the next one. The network’s drawer then lists what you declared, each with the name to paste into a query.
# what did the printers talk to today?
FROM sessions | LAST 86400 | WHERE ip WITHIN "office.printers"

# a test device reaching the internet — usually worth knowing about
FROM sessions | WHERE ip WITHIN "office.test_device" AND ip WITHIN "internet"
The same names work as src: / dst: in Flow Matrix rules, so
“nothing but the printers should reach the print server” becomes a rule you
can write in the words you already use.
A few things worth knowing:
- Sub-ranges may not overlap each other. An address belongs to at most one of them, so a query has one answer.
- They may overlap the DHCP pool. That is on purpose: a printer holding
a DHCP reservation is both
office.dhcpandoffice.printers. dhcpandstaticare reserved. Those two are obserae’s own, and letting you redefine them would makeoffice.dhcpambiguous.- Both bounds must sit inside the network’s CIDR, and up to 32 sub-ranges
per network. Names are lowercase letters, digits,
-and_— no dot, since the dot is what separates the network from the slice. - If you have a host whose name contains a dot and it happens to match a
network.subrangespelling, the host wins. Writenetwork:office.printersto reach the sub-range explicitly. - Historical network names may contain dots too. The explicit form first checks the exact network, then falls back to a sub-range. A network and a qualified sub-range may not have the same spelling; validation refuses it.
- The map stays uncluttered. Unlike the DHCP pool, a sub-range gets no node of its own on the graph — it is a name, not a piece of topology.
Deleting things — impact preview
Every deletion first asks the daemon what will cascade and shows the summary before anything is removed. In the GUI, the impact preview appears as a side drawer. From the CLI:
$ obserae-cli network rm admin
Deleting network admin will:
  - delete 11 entities
  - modify 0 entities
Proceed? [N/y/I] I
Deletes:
  - network admin
  - interface bastion:eth0
  - interface proxy:eth0
  …
Proceed? [N/y/I] y
deleted 11 entities.
N(default) aborts.ycommits.Ilists every affected entity, then re-prompts.--yesskips the prompt entirely (scripts).--dry-runshows the impact without ever calling delete.
YAML format
The canonical way to describe your topology is one YAML file — the
cartography: section of the single consolidated config bundle. Import it
from the CLI (obserae-cli config …) or from the GUI’s
configuration bundle.
networks:
  - name: "admin"
    cidr: "192.168.0.0/24"
    vlan: 10                       # optional, 1..4094
    description: "Out-of-band management"
  - name: "data"
    cidr: "192.168.3.0/24"
    vlan: 40
  - name: "office"
    cidr: "192.168.10.0/24"
    dhcp_start: "192.168.10.100"   # optional DHCP pool (see above)
    dhcp_end: "192.168.10.200"
    ranges:                        # optional named sub-ranges (see above)
      - name: "printers"
        start: "192.168.10.20"
        end: "192.168.10.29"
  - name: "docker-default"
    cidr: "172.18.0.0/16"
    nat_gateway: "pg-01"           # optional topology gateway; rules are in
                                   # the top-level nat.rules section

hosts:
  - name: "pg-01"
    documentation: |               # optional free-form markdown
      # pg-01
      Primary **PostgreSQL** node. Nightly backup at 02:00.
    interfaces:
      - name: "eth0"
        network: "admin"
        ip: "192.168.0.50"
      - name: "eth1"
        network: "data"
        ip: "192.168.3.50"
    services:
      - name: "ssh"
        protocol: TCP
        port: 22
        interfaces: ["eth0"]
      - name: "postgres"
        protocol: TCP
        port: 5432
        interfaces: ["eth1"]
        description: "Primary"

groups:
  - name: "postgres"
    members: ["pg-01", "pg-02"]
  - name: "databases"
    members: ["postgres", "redis"]   # groups can nest
obserae-cli config import   config.yml      # apply (cartography section replaces the topology)
obserae-cli config export   --output a.yml  # pull the whole config, cartography included
Validation rules
The daemon refuses any import that violates one of:
- Names are unique across networks/hosts/groups.
- The names
internet4,internet6,internal4,internal6,any4andany6are reserved keywords and cannot be redeclared. - A network’s
cidrparses to a canonical form (no host bits set). Any prefix length is accepted, including the default route0.0.0.0/0and::/0. - VLAN id is in
1..4094(or omitted). - A DHCP range, if present, sets both
dhcp_startanddhcp_end, with both inside the network’s CIDR anddhcp_start <= dhcp_end. - A named sub-range sits inside the network’s CIDR with
start <= end, has a unique name on that network that is neitherdhcpnorstatic, and does not overlap another sub-range. Its qualified spelling may not collide with a network name. Up to 32 per network. - A
nat_gateway, if present, names an existing host that has at least one interface outside the network it translates for — a host with no foot outside cannot translate anything. See NAT. Deleting that host clears the declaration instead of blocking the delete; the confirmation shows the network as modified. - Interface name is non-empty and unique on its host.
- An interface’s
ipparses and lies inside its network’s CIDR. IPv4 and IPv6 are both accepted. The reserved networks have their own per-family routability rule:internet4only accepts a publicly-routable IPv4 (no RFC1918, loopback, link-local, CGNAT, multicast, reserved);internet6only accepts a global unicast IPv6 (no ULA, loopback, link-local, multicast).internal4/internal6are the exact complement — they only accept the non-routable addresses of their family (RFC1918 / ULA, loopback, link-local, etc.).any4/any6accept any address of the matching family. - Service name is non-empty and unique on its host.
- A service’s
protocolis one of:TCP,UDP,ICMP,IGMP,GRE,AH,ESP,OSPF,SCTP,ICMPv6. Names are case-insensitive. TCP,UDPandSCTPservices declare a port in1..65535. Every other protocol (the layer-3 ones — ICMP, IGMP, GRE, AH, ESP, OSPF, ICMPv6) must not declare a port.- A service binds to at least one interface that exists on the same host.
- Group members exist as hosts or as previously-declared groups.
- Group nesting is acyclic.
A failed import never mutates the database — the operation is atomic: the whole bundle is checked before anything is written, so a bad file is refused rather than half-applied.
Per-entity (CLI)
# Create
obserae-cli network add prod-vlan20 --cidr 10.20.0.0/16 --vlan 20
obserae-cli host add srv-db-01

# Scoped under a host
obserae-cli interface add eth0 --host srv-db-01 \
    --network prod-vlan20 --ip 10.20.0.5
obserae-cli service add postgres --host srv-db-01 \
    --protocol TCP --port 5432 --interfaces eth0

# Groups
obserae-cli group add backend --members srv-db-01,srv-web-01
obserae-cli group update backend --add-member srv-monitoring
obserae-cli group update backend --rm-member srv-web-01

# Read
obserae-cli network ls
obserae-cli host show srv-db-01
obserae-cli group ls --json

# Rename
obserae-cli host update srv-db-01 --name srv-db
Live rule recompilation
Every cartography mutation triggers a recompile of every Flow Matrix rule that references the touched entity (directly or via a group). Practical consequences:
- Add a host to
group:backends→ every rule that mentionsbackendsimmediately applies to the new host’s interfaces. - Rename a network → every rule that referenced it by
network:OLDatomically updates. - Delete a host referenced by a rule → the rule is quarantined
(its
last_compile_erroris populated, its matcher cursor is paused). Fix the cartography or the rule to clear it.
There is no manual “recompile” command — every supported edit triggers it.
References used by rules and NFQL
Both Flow Matrix rules (src:, dst:) and NFQL string literals compared to
INET columns accept the same grammar:
| Form | Meaning |
|---|---|
any4 | Reserved keyword: every IPv4 address (0.0.0.0/0) |
any6 | Reserved keyword: every IPv6 address (::/0) |
internet4 | Public unicast IPv4 — 0.0.0.0/0 minus RFC1918, loopback, link-local, CGNAT, multicast and reserved ranges |
internet6 | Public unicast IPv6 — ::/0 minus ULA (fc00::/7), loopback, link-local (fe80::/10), multicast and IPv4-mapped ranges |
internal4 | Non-routable IPv4 — the exact complement of internet4 (RFC1918, loopback, link-local, CGNAT, multicast, reserved) |
internal6 | Non-routable IPv6 — the exact complement of internet6 (ULA, loopback, link-local, multicast, mapped) |
host:NAME | Every interface IP of the named host |
host:NAME:IFACE | One specific interface IP |
group:NAME | Every interface IP of every member host (recursive) |
network:NAME | The whole CIDR of the named network |
NAME.dhcp | Just the network’s DHCP pool (needs a DHCP range) |
NAME.static | The network’s CIDR minus its DHCP pool |
NAME.SUB | One named sub-range of the network |
NAME (bare) | Looked up across networks / hosts / groups |
NAME:IFACE (bare) | Same as host:NAME:IFACE |
The reserved keywords are family-specific: internet4 / internet6,
internal4 / internal6 and any4 / any6 each expand to one IP family
only. There is no bare internet / internal / any keyword that spans
both — if you need both families, declare two rules (or two NFQL clauses)
using the v4 and v6 variants side by side. The keyword definitions are
evaluated by the same code path in the rule engine and the NFQL planner, so a
rule and a query that both reference internet4 (or internal4) see the
exact same CIDR set.
internal4 / internal6 are the exact complement of internet4 /
internet6 within their family: every routable address satisfies one, every
non-routable address satisfies the other, never both. Use internal4 to say
“anything on the LAN” without spelling out the RFC1918 / loopback /
link-local CIDRs.
Complete example
The quickstart walks through a minimal topology you can copy and adapt. A realistic three-tier setup looks like this:
- 5 VLANs (public, admin, egress, frontend, data).
- Edge hosts (DNS, bastion, proxy).
- Load balancers, backend tier, database tier (Postgres + Redis).
- Composite groups so you can write
ip == "production"orip == "databases"and get the obvious answer.
Build it incrementally with the CLI (network add, host add, …) or author
one YAML file and import it in one shot.
Adapt it to your own infrastructure as a starting point.
Where to next
- Flow Matrix rules — write your allowed-traffic baseline against the entities you just declared.
- NFQL — query your traffic using the same names.
- Web GUI — the Cartography page in the interface tour.